Introduction
Since version 2021.01 a new display has been introduced Annotation Display.
It has been introduced to
- Show special remarks that are valid for a specific location for a specific period
- Define the text on a location basis and not time series basis
Besides the text of the annotation itself it is possible to define extra properties which belong to the annotation for this see Annotation Metadata Schema
There are two different ways of enabling the Annotation Display, both via the explorer task. One without specific config <predefinedDisplay>annotation display</predefinedDisplay> and one with referring to the display config file <displayConfigFileName>AnnotationDisplay</displayConfigFileName>
		<explorerTask name="Annotation Display">
			<!--<predefinedDisplay>annotation display</predefinedDisplay>-->
			<displayConfigFileName>AnnotationDisplay</displayConfigFileName>
			<toolbarTask>true</toolbarTask>
			<menubarTask>true</menubarTask>
			<loadAtStartup>true</loadAtStartup>
		</explorerTask>
The config file of the annotation display currently only holds 3 optional elements to add permissions.
<?xml version="1.0" encoding="UTF-8"?>
<annotationDisplay xmlns="http://www.wldelft.nl/fews" xmlns:xsi="http://www.w3.org/2001/XMLSchema-instance" xsi:schemaLocation="http://www.wldelft.nl/fews http://fews.wldelft.nl/schemas/version1.0/annotationDisplay.xsd">
	<createPermission>PermissionA</createPermission>
	<editPermission>PermissionB</editPermission>
	<deletePermission>PermissionC</deletePermission>
</annotationDisplay>
Usage
When configured correctly the Annotation Display will be come visible in the tabs.
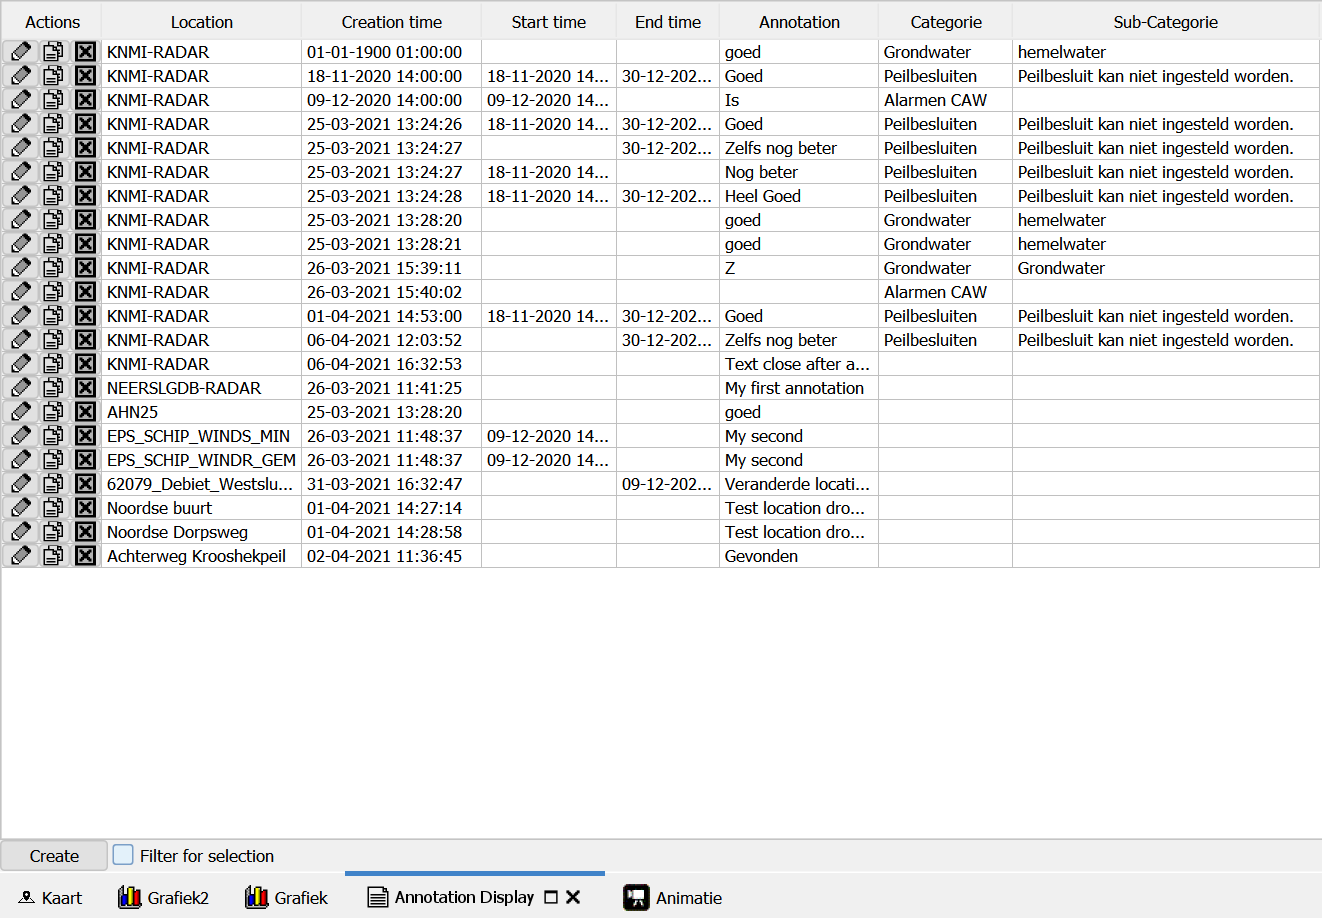
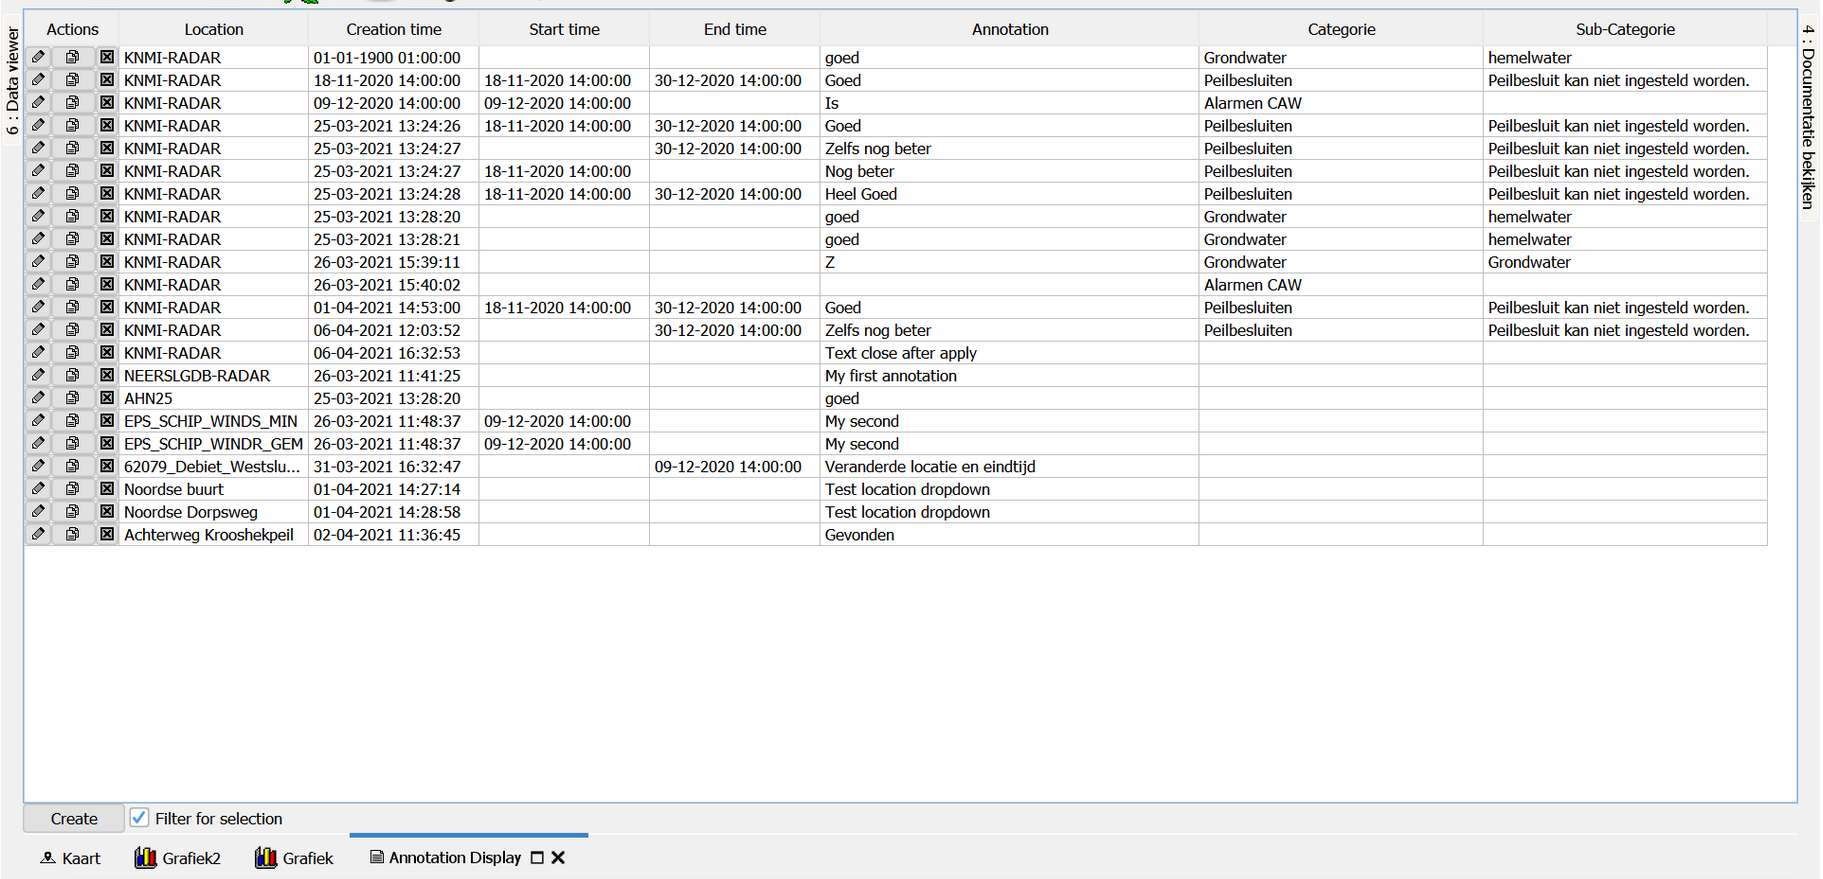
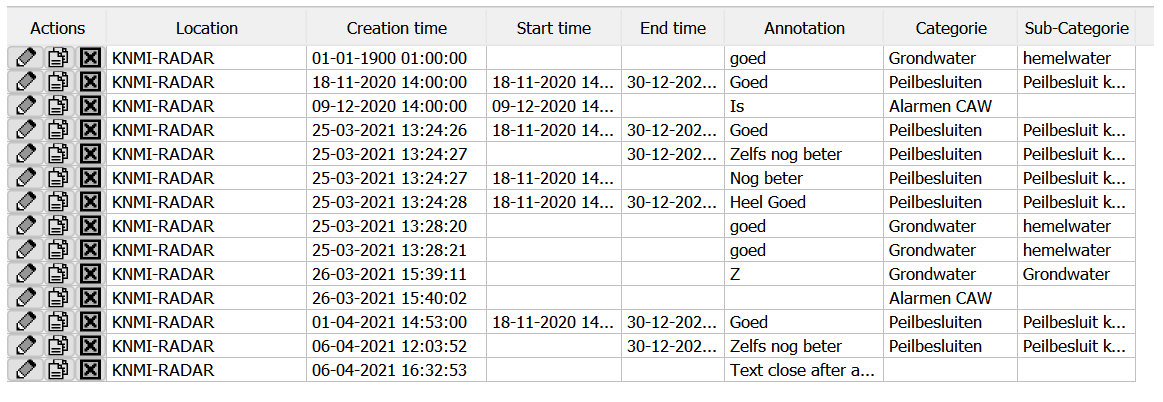
By default it will show all annotations for all locations:
The location and creation time columns will always be filled, they uniquely identify the annotation. Start time is optional, no start time means the annotation has always been valid in the past. End time is optional, no end time means the annotation is valid until an undetermined time in the future.
The annotation column shows the actual message for the location, this can be empty but that would only make sense if there would be extra properties defined with it that contain useful information like "Categorie" and or "Sub-Categorie"
Filtering
Rows in the table can be filtered by double clicking on a cell, this works in a similar way as for instance the database viewer and sample viewer.
When filtering is active this is shown by a blue background for the filtered columns.
Filtering can be applied to multiple columns at once and double clicking on a cell in a filtered column removes the filtering for that column.

Creating new annotation
When pressing the "create" button on the bottom a popup screen will show from which the user can input the desired information for creating a new annotation.
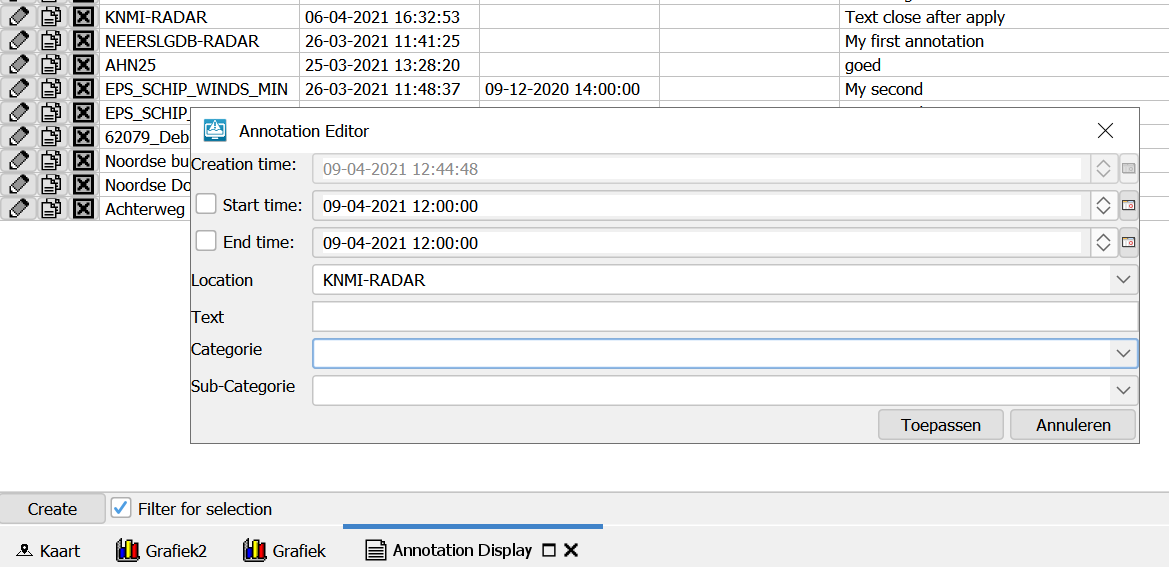
For each configured annotation property there will be an input field created automatically.
For configuring annotaion properties see Annotation Metadata Schema.
For a plain string property like "freeText" below a text input field is used.
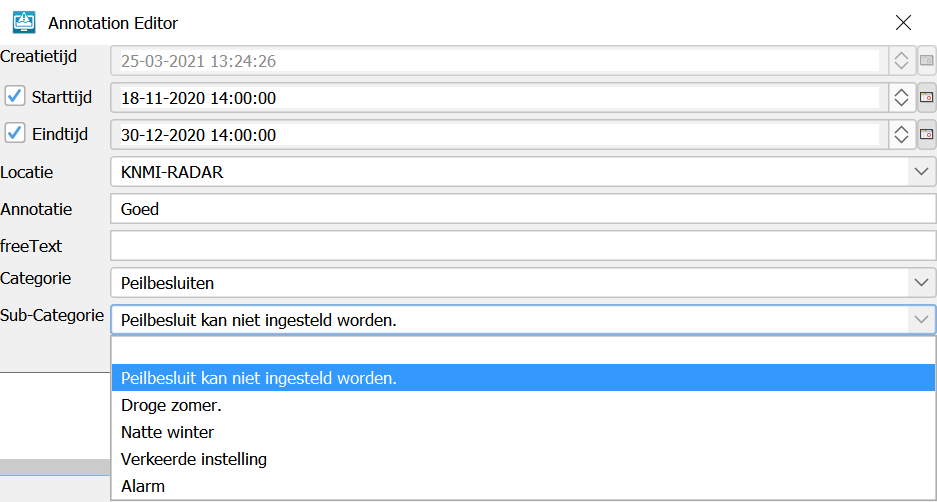
For an enumeration property a dropdown is used.
When an enumeration property with constraints is used and the property on which the constraints are based is already filled in then only the valid enumeration values will be shown in the dropdown:
Edit, copy and delete
When the "edit" / "pencil" button is pressed for an annotation the same Annotation editor popup will show with the values for the existing annotation already filled in.
When the "copy" / "double document" button is pressed, the annotation is duplicated, this can be useful if a new annotation needs to be created that is very similar to an already existing one. After the copy button the edit butten can then be used.
When the "delete" / "cross" button is pressed the selected annotation will be deleted immediately.
Listening to selection
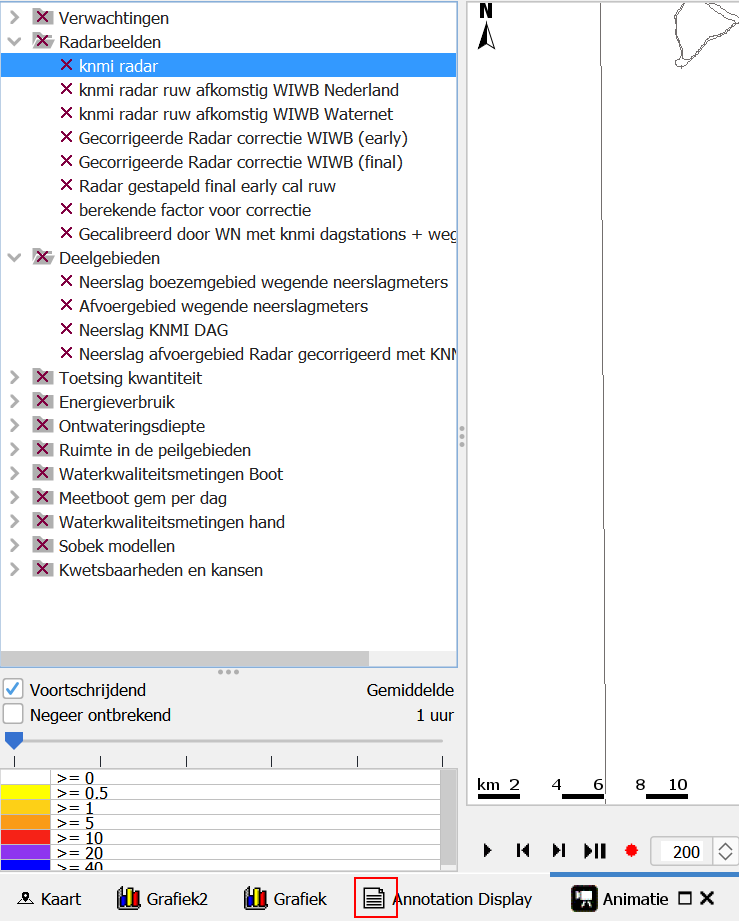
The Annotation Display both listens to the selected locations from the Time Series Dialog as from the Grid Display.
When there is at least one annotation available for the selected locations, the icon of the Annotation Display will be black
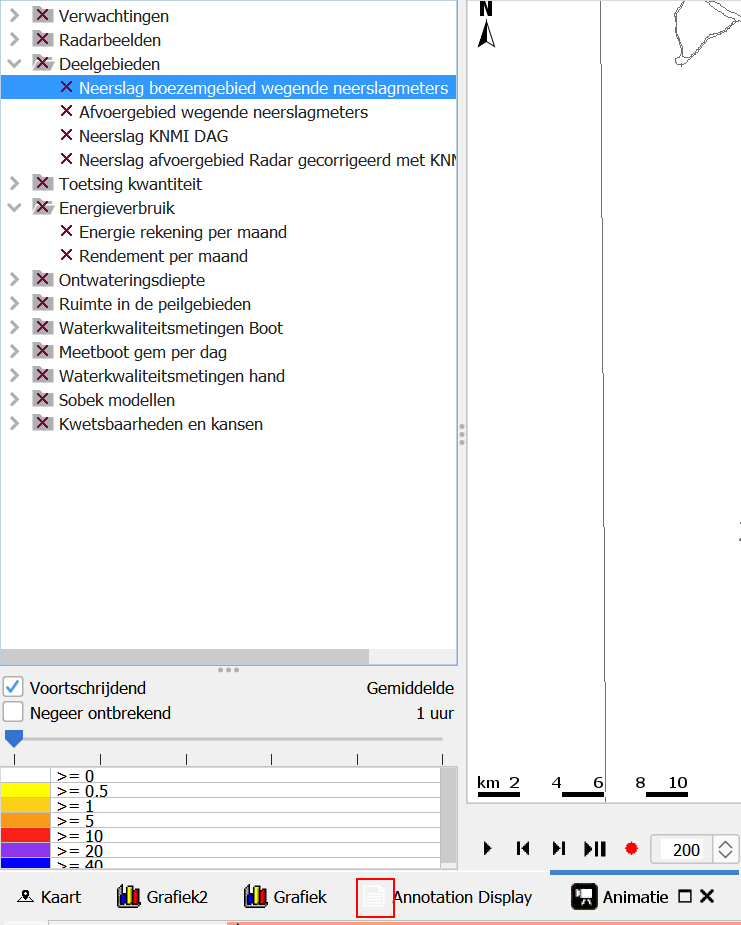
But when there are no annotations available for the selected locations the icon will become white:
When a selection is made from the time series dialog or grid display it can be chosen to filter for that selection (or not) via the "filter for selection" checkbox on the bottom.
Below the KNMI-RADAR location has been selected in the grid display and "filter for selection" is checked so only annotations for KNMI-RADAR are shown.
When "filter for selection" is unchecked annotation for all locations are shown.