When PostgreSQL/PostGIS is installed also a lot of utilities have been installed, such as psql.exe (located in the bin directory of PostgreSQL (C:\Program Files\PostgreSQL\9.2\bin)).
First thing that has to be done when importing data into a PostgreSQL database is defining a data base. Start up the utility pgAdminIII
Now stepwise until a table is created. Step 1 is creating a database:
Right mouse button on database in the 'server' localhost, Select new database. 


Give the database a name. Select tabpage definition. This is very important. If you want to work with PostGIS you have to select the postgresql/postgis template so you get the datatype that stores geometry (i.e. point, line, polygon and from PostGIS 2.0 also rasters). Afther selecting the tabpage Definition following figure should be available. 
Click ok (unless more advanced options are desired, which are out of scope at this moment). From the database level next picture should be visible (depending on the version of PostGIS installed, this picture is similar to PostGIS2.0). 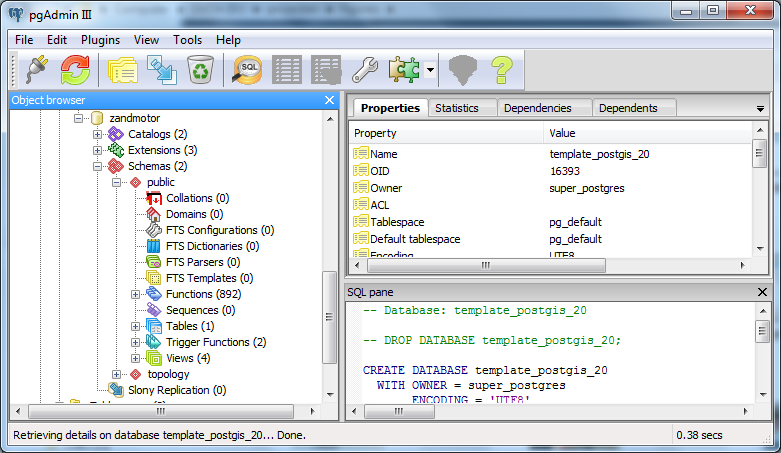
Several characteristics are available, these are:
- schemas (public and topology, the public schema is the base schema, every other application that contacts PostgreSQL/PostGIS check this schema first)
- functions, in this case 892 functions that come with PostGIS. These are GIS functions. Check the manual of PostGIS for a full description of the options that PostGIS offers.
- Tables, by default from PostGIS2.0 it is 1 table with references to all spatial reference systems described in the PROJ4 library (see spatialreference.org for the full list of descriptions)
- Views, by default there are already 4 views available of which two are filled by so called triggers. In this case the view geometry_columns is filled with 1 record if a user creates a table with a field called geometry.
First step after all this is creating a table with all fields necessary.This is done in the next step. 
Immediately add the columns desired using the columns tab page like the picture below.

Please check the data type with respect to the data in the csv that has to be uploaded. This is essential for some data type (date for instance).
In stead of the above 2 steps you could also add a table to the public schema using the Query window. Start up the Query manager by pressing Ctrl+E and type the following lines (example of the temperatures in Spitsbergen).
create table temperatures(
latitude double precision,
longitude double precision,
area text,
depth_water_m double precision,
temp_c_from double precision,
temp_c_to double precision,
ph double precision,
elect_cond_us_cm double precision,
cl__meq_l double precision,
at_mmoleq_l double precision)
Notice that the column names are in lower case and that special characters have been removed (the minus sign in cl-_meg_l for instance).
Navigate to the directory where the csv file is stored and start the command prompt. Or start the command prompt and navigate to the directory with the csv file using common command options (check this website if you don't know how to work with the command prompt).
Make contact with you locally installed database via:
psql \--host=localhost \--dbname=yourdatabasename \--username=yourusername

\copy temperatures from yourcsvfile with csv header;
In the command prompt this should look like this. 
In the picture above you also see how to navigate to a certain directory using the command prompt.
At this stage you have your csv file loaded. In this case with the small amount of records (lines) this will only take a fraction of a second. In case several millions of records it could take some minutes.
Go to pgAdminIII and open the query manager (Ctrl + E) and append the table with a geometry column and press (Ctrl + E or press the green play button). The command for adding a column is:
alter table temperatures add column the_geom geometry
Populate the column the_geom with geometry values (in this case points constructed from latitude longitude values with the spatial reference ID of wgs84).
update temperatures set the_geom = st_setsrid(st_point(latitude, longitude),4326);
the command above is build up of several parts:
- update tablename statement
- the set column statement
- the set spatial reference id statement (st_setsrid)
- the create point statement
If everything went well there now is a table whith a geometry column which can be visualised on Google Earth for instance (or in QGIS, or whatever). For that you can return to the page of the workshop vectors and OpenGIS.