Table of contents
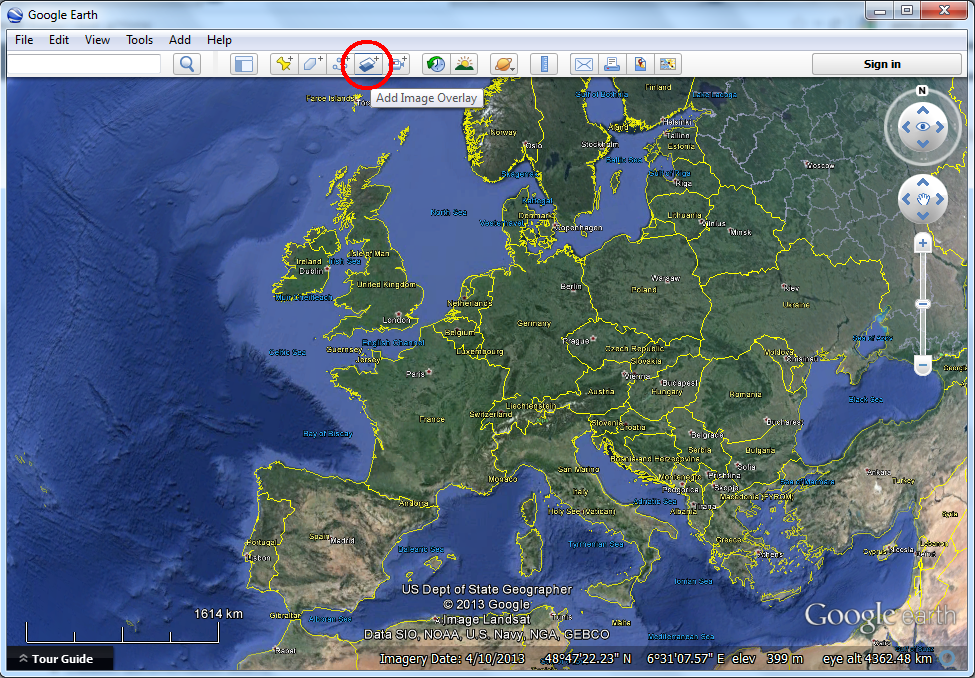
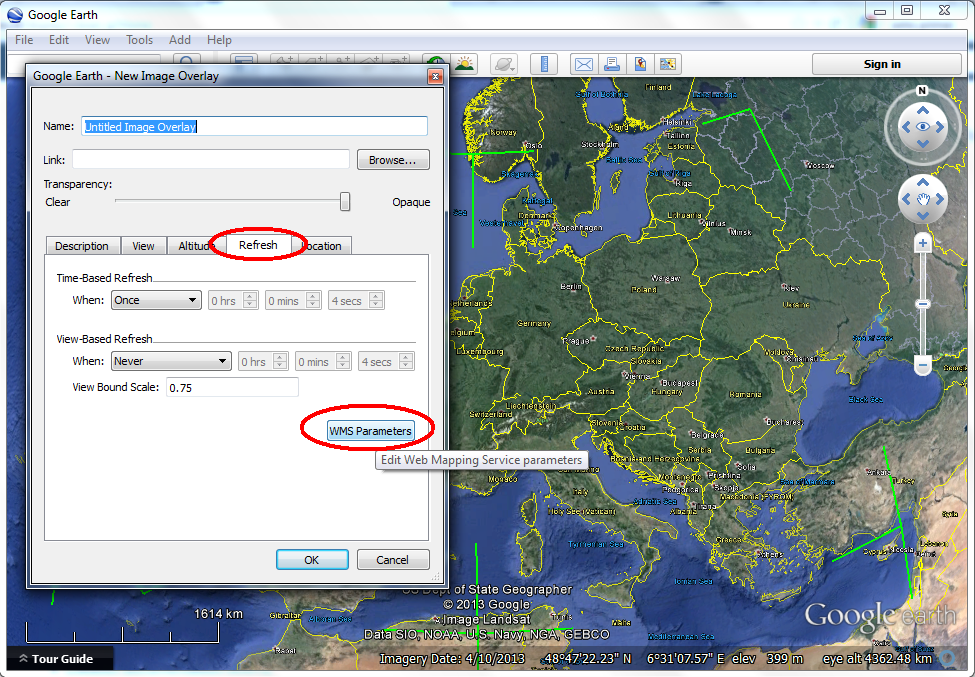
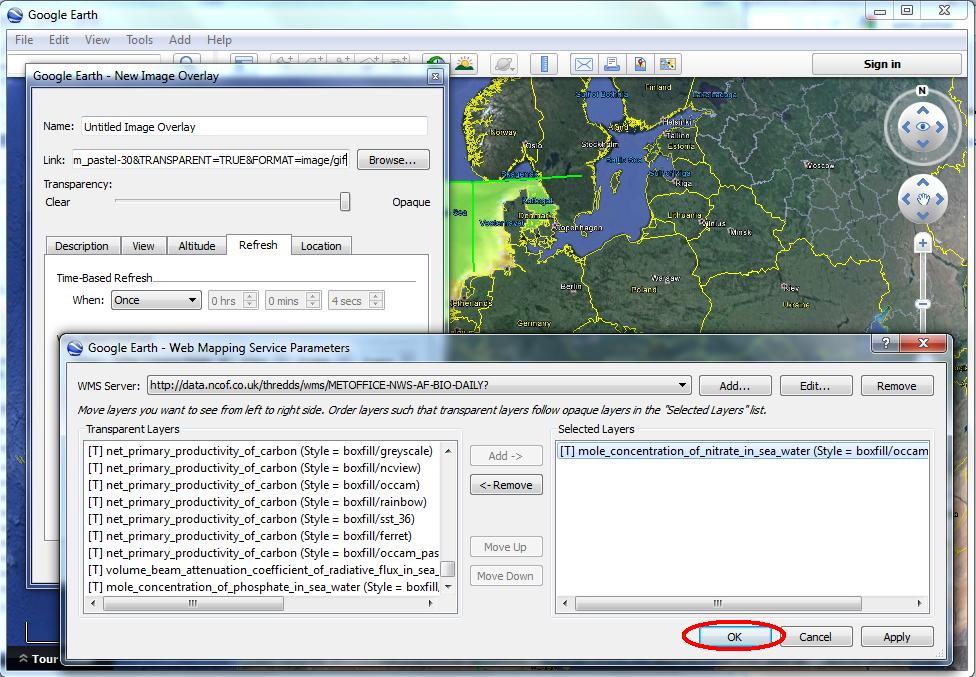
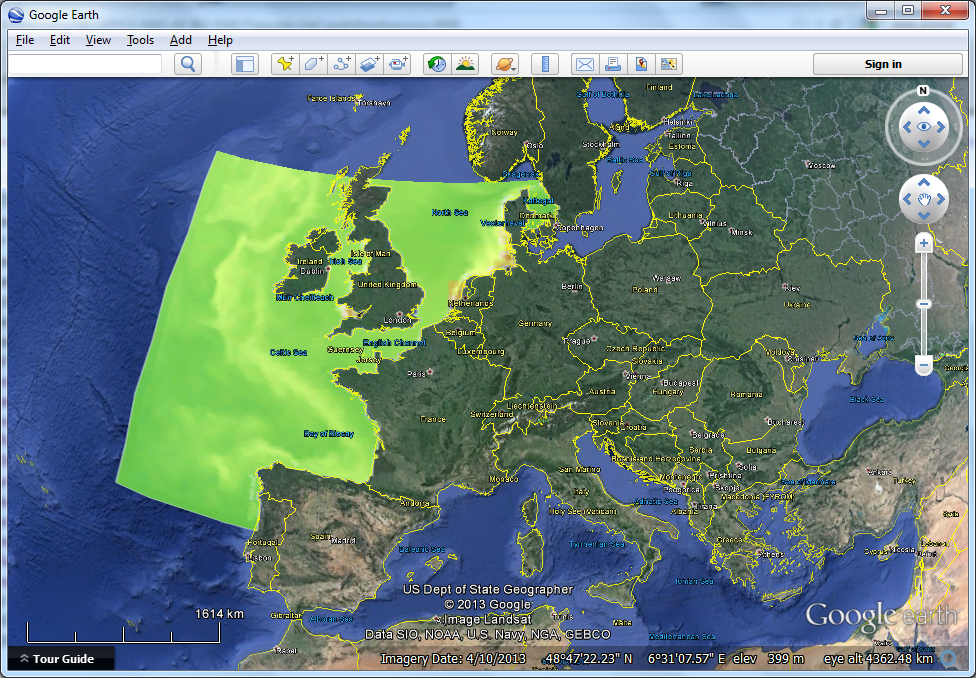
Add a WMS layer via the Google Earth user interface

Add a WMS layer by editing a kml file
If you save the WMS layer you created via the GUI, you can save that to a separate .kml file. IF you save as a .kmz, that is simply a zipped .kml. You can now edit the .kml in an ASCII edit such as notepad, wordpad or textpad, to see what the syntax is for showing a WMS layer in Google Earth.

Once saved, you will see that kml uses a so-called GroundOverlay element.
<?xml version="1.0" encoding="UTF-8"?> <kml xmlns="http://www.opengis.net/kml/2.2" xmlns:gx="http://www.google.com/kml/ext/2.2" xmlns:kml="http://www.opengis.net/kml/2.2" xmlns:atom="http://www.w3.org/2005/Atom"> <GroundOverlay> <name>Untitled Image Overlay</name> <Icon> <href>http://data.ncof.co.uk/thredds/wms/METOFFICE-NWS-AF-BIO-DAILY?VERSION=1.1.1&REQUEST=GetMap&SRS=EPSG:4326&WIDTH=512&HEIGHT=512&LAYERS=N3n&STYLES=boxfill/rainbow&TRANSPARENT=TRUE&FORMAT=image/gif&</href> <viewRefreshMode>onStop</viewRefreshMode> <viewBoundScale>0.75</viewBoundScale> </Icon> <LatLonBox> <north>66.22176887010372</north> <south>25.35615986229249</south> <east>314.0583306192361</east> <west>45.71559353826041</west> </LatLonBox> </GroundOverlay> </kml>
The GroundOverlay is en element that positions any image on the globe by describing its bounding boxes. The image can be a local image, one that you saved to your local harddisk, or a image on the web. For WMS, the image is actually generated on the fly, using a a very long url. We explain the construction of this url on a separate wms primer.
- Note that you need to replace all
&sumbols in the url with the html encoding for that "& a m p ;" (without spaces). - Note that the
hrefelement contains a full valid WMS url EXCEPT thebboxkeyword. Google Earth will automatically use thebboxkeyword depending on where you zoomed. This makes sure that you always see the WMS when you are in the correct region, and that the resolution will be better when you zoom in. - The
GroundOverlaysubelement<viewRefreshMode>is essential for this, only when you stop zooming, Google Earth will update the image.
Mastering WMS performance by editing a kml file
With the previous manual editing of kml files, you can add any WMS to your Google Earth. However, often you will not see nice WMS images, but a 'request in progress' arrow.
You can prevent this by switching of the automatic updating of WMS, and simply download the WMS image and refer to a local file, or use WMS as a means to refer to images as if they were static images on the web. You can do this by making sure
- ensure that the
hrefelement DOES contain a full valid WMS url INCLUDING thebboxkeyword. Google Earth will now consider ther WMS url as a regular weblink, and not update at all. - make sure the
<LatLonBox>has the same bounding box. - The
GroundOverlaysubelement<viewRefreshMode>need to be removed.
Note that the WMS image still need to be request once, so initially you still see the 'request in progress' arrow. IF you wan tto reuse the image, you can also request the image yourselves in a web browser, save it, and point to it locally with the href element.
Mastering WMS appearance by editing a kml file
In a WMS url there are some optional argument, like time and elevation. GIS clients like Google Earth by default use the default value for these dimensions. For temporal data, usually the last time step is shown only, for instance in this WMS of the Dutch KNMI rain radar. When you edit a kml, you can insert on-default values for these parameters. In addition, you can specify better values for non-standard extensions like COLORSCALERANGE.