...
A green or blue icon indicate that the workflow was succesfullsuccessful, The icons also indicate if the time zero which was used in the last run of a node is the same as the time zero which is currently selected for a node.
If the time zero is different then the icon will indicate that the available run is invalid. In systems which have a small cardinal time step this behaviour behavior can be problematic because runs are marked as being invalid too quickly.
...
If the status of a topology node is determined by a server run and its parent node has a more recent server run then the node will inherit the status from its parent. If this is set to false, then the server run of the parent node will be ignored.
ModifierDisplay
showModifiers
The option is only available at group nodes. By default the modifiers panel doesn't show modifiers at group nodes. This choice was made because of performance reasons.
In addition it is not common that modifiers are made at group nodes. In the cases that it is required that modifiers can be shown (and edited) at a group node the default behavour can be
changed. This option is only available at group nodes.
hideModifiersOverviewPanel
The modifiers panel consists of two parts. An overview panel which shows all the modifiers which are available for the selected node and a detail panel which shows the details of the modifier which is selected in the overview panel or the new modifier which the user is creating.
The overview panel uses the half of the space of the modifiers panel. By hiding this panel a lot of space is available for the detail panel. This is a useful feature when users only create modifiers at a node and want to use all the available space for the detail panel.
modifiersReadOnly
This option can be used to disable the possibility to add, edit or delete modifiers at a node.
defaultModifierId
If a default modifier id is defined at a node then the first available modifier of the defined type will be selected in the modifiers panel. If there is no modifier of this type is available then a new modifier template is created in the modifiers detail panel. An example is shown below.
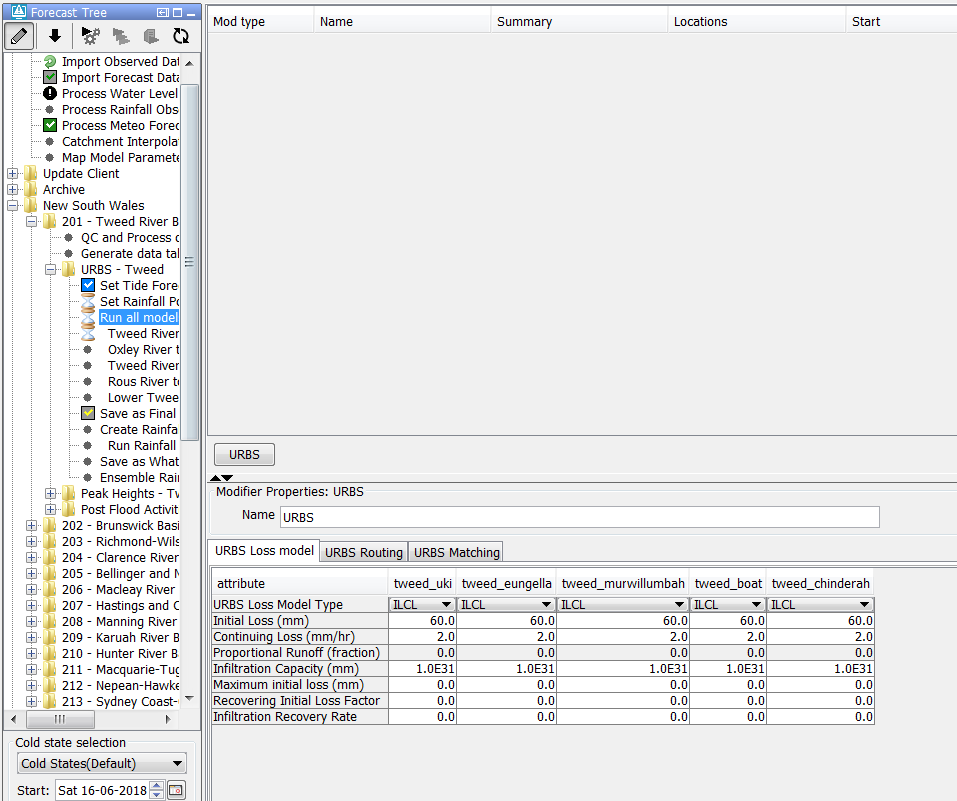
In the example above a node "Run all Models" is shown. This node has a defaultModifierId defined and set to URBS.
After selecting the node "Run all models" a modifiers template for the modifiers type "URBS" will be created. The user can edit this template and create a new modifier by pressing apply.
Below an another example:
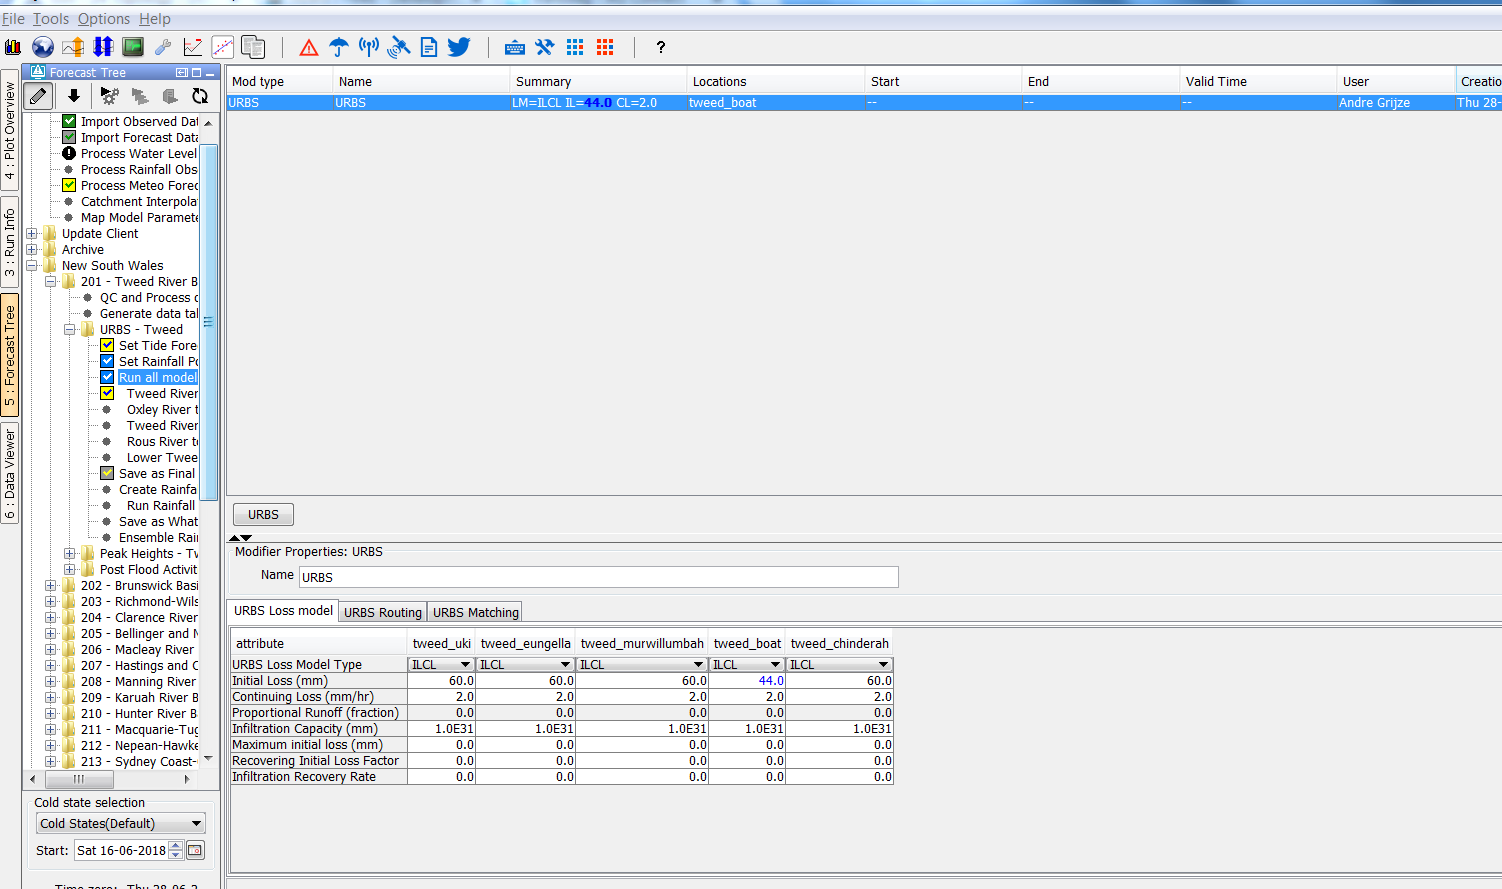
In this example the user has selected the same node. The difference with the previous example is that there is already a modifier of type URBS available.
Because this modifier is available it will be selected instead of creating a new modifiers template.
onlyAllowEditDefaultModifier
If this option is configured only the defined default modifier is editable.
visibleModifierGroup
This option defines the group of modifiers which is visible and editable at a node. It is possible to define multiple visible modifier groups for a node. By default all modifiers are visible and editable.
The modifier group should be defined in the modifierTypes.xml.
popupMessageUncommittedModifiers
This option can be used to define a warning message which will be shown when a user leaves a topology node with uncommitted modifiers.
modifiersIconVisible
Configure option <modifiersIconVisible>true</modifiersIconVisible> at the beginning of the Topology.xml to show an indicator for active modifiers. This indicator is continuously visible and appears as soon as an modifier is created or activated.
The indicator is displayed at the leaf segments . The group segments do not show this indicator.

Permissions
There are several configurations options available with regard to permissions.
...
This permission controls who can view this node
...
Threshold icons
(Since 2019.02 release) Location threshold icons can be added to the Forecast Tree (Topology). In Delft-FEWS thresholds are configured in the Thresholds.xml and ThresholdValueSets.XML. The Thresholds.xml file contains the thresholds and the thresholdValueSets the time series that are used for thresholds. The time series have a RelativeViewPeriod configured that is used to find threshold crossings relative to the FEWS system time.
In the Topology.xml a node can have a locationId element and a thresholdValueSetId element configured. The Topology will then check if for this location a threshold, included in the thresholdValueSetId has a threshold crossed in the configured Relative View Period. The threshold icons can be visualised by pressing the threshold icon in the toolbar of the Topology.
| Code Block | ||
|---|---|---|
| ||
<node id="dnlmfdo_4037_Level" name="Mytham Bridge (River Derwent)">
	<locationId>4037</locationId>
	<plotId>Fluvial_Level_Gauge_MFDO</plotId>
	<mainPanel>time series dialog</mainPanel>
	<thresholdValueSetId>Level Thresholds</thresholdValueSetId>
</node> |
ModifierDisplay
showModifiers
The option is only available at group nodes. By default the modifiers panel doesn't show modifiers at group nodes. This choice was made because of performance reasons.
In addition it is not common that modifiers are made at group nodes. In the cases that it is required that modifiers can be shown (and edited) at a group node the default behavour can be
changed. This option is only available at group nodes.
hideModifiersOverviewPanel
The modifiers panel consists of two parts. An overview panel which shows all the modifiers which are available for the selected node and a detail panel which shows the details of the modifier which is selected in the overview panel or the new modifier which the user is creating.
The overview panel uses the half of the space of the modifiers panel. By hiding this panel a lot of space is available for the detail panel. This is a useful feature when users only create modifiers at a node and want to use all the available space for the detail panel.
modifiersReadOnly
This option can be used to disable the possibility to add, edit or delete modifiers at a node.
defaultModifierId
If a default modifier id is defined at a node then the first available modifier of the defined type will be selected in the modifiers panel. If there is no modifier of this type is available then a new modifier template is created in the modifiers detail panel. An example is shown below.
In the example above a node "Run all Models" is shown. This node has a defaultModifierId defined and set to URBS.
After selecting the node "Run all models" a modifiers template for the modifiers type "URBS" will be created. The user can edit this template and create a new modifier by pressing apply.
Below an another example:
In this example the user has selected the same node. The difference with the previous example is that there is already a modifier of type URBS available.
Because this modifier is available it will be selected instead of creating a new modifiers template.
onlyAllowEditDefaultModifier
If this option is configured only the defined default modifier is editable.
visibleModifierGroup
This option defines the group of modifiers which is visible and editable at a node. It is possible to define multiple visible modifier groups for a node. By default all modifiers are visible and editable.
The modifier group should be defined in the modifierTypes.xml.
popupMessageUncommittedModifiers
This option can be used to define a warning message which will be shown when a user leaves a topology node with uncommitted modifiers.
modifiersIconVisible
Configure option <modifiersIconVisible>true</modifiersIconVisible> at the beginning of the Topology.xml to show an indicator for active modifiers. This indicator is continuously visible and appears as soon as an modifier is created or activated.
The indicator is displayed at the leaf segments . The group segments do not show this indicator.
Permissions
There are several configurations options available with regard to permissions.
viewPermission
This permission controls who can view this node
runWorkflowLocallyPermission
Permission to run the workflow for a node locally
runWorkflowAtServerPermission
Permission to run the workflow for a node at the server
runSecondaryWorkflowPermission
Since 201801. Permission to run the secondary workflow
...
Permission to run the workflow for a node locally
...
Permission to run the workflow for a node at the server
...
Since 201801. Permission to run the secondary workflow
Thresholds
Location threshold icons can be added to the Forecast Tree (Topology). In Delft-FEWS thresholds are configured in the Thresholds.xml and ThresholdValueSets.XML. The Thresholds.xml file contains the thresholds and the thresholdValueSets the time series that are used for thresholds. The time series have a RelativeViewPeriod configured that is used to find threshold crossings relative to the FEWS system time.
In the Topology File a node can have a locationId element and a thresholdValueSetId element configured. The Topology will then check if for this location a threshold, included in the thresholdValueSetId has a threshold crossed in the configured Relative View Period. The threshold icons can be visualised by pressing the threshold icon in the toolbar of the Topology.
<node id="dnlmfdo_4037_Level" name="Mytham Bridge (River Derwent)">
<locationId>4037</locationId>
<plotId>Fluvial_Level_Gauge_MFDO</plotId>
<mainPanel>time series dialog</mainPanel>
<thresholdValueSetId>Level Thresholds</thresholdValueSetId>
</node>
This functionality is available since 201902.
Buttons
Details about the buttons can be found here: 23 Interactive Forecasting Displays#23InteractiveForecastingDisplays-Buttonbar
...