Contents
- 1 Contents
- 2 Create a virtual machine
- 3 Install LINUX operating system
- 4 Install Subversion and create repositories
- 5 Install Tomcat and Thredds (OpenDap server for netCDF files)
- 6 Install Apache webserver (webserver for kml files)
- 7 Install OpenSSH to enable use of WinSCP
- 8 Overview of useful commands
Printing: If you want to print this document select tools -> export to pdf from the top right corner
Acknowledgements
- This Installation Protocol is developed by the Data and Knowledge Management section of the Building with Nature programme
 as a Deliverable of [*Workpackage DM 1.1*]
Create a virtual machine
 Register at VMWARE and download "VMWARE Server" at https://www.vmware.com/
![]() . Make sure you write down the Windows code as it is needed to install VMWare Server. Once VMWare Server is installed (login with administrator rights if needed) open it and create a virtual machine:
. Make sure you write down the Windows code as it is needed to install VMWare Server. Once VMWare Server is installed (login with administrator rights if needed) open it and create a virtual machine:
- Give name [next]
- Select operating system
- Select Linux and choose as version: Ubuntu Linux (32 bits) [next]
- Select memory and number of processors to use
- Memory 512 MB (default)
- 1 processor (default) [next]
- Select hard disk option
- Now select "Create a New Virtual Disk" this will be replaced by another disk later
- select a storage capacity (e.g. 100 GB)
- leave rest of the properties at their default values [next]
- Add a network adaptor
- Select "Network Connection" option: "Bridged" (this arranges that the virtual machine has the same internet settings as its 'real' host
- Do connect a CDROM/DVD drive (select defaults) [next]
- Do NOT connect floppy [next]
- Do connect USB (select defaults) [next]
Install LINUX operating system
 Download ubuntu Desktop version 9.04 from http://www.ubuntu.com/GetUbuntu/download
![]() and install it (the download is an ISO-file). Make a map ISO in "d:\Virtual Machines" and copy the UBUNTU ISO image there. In VM Ware select the virtual server you created and select in the hardware list the CDROM/DVD option. Choose edit. Under the section "ISO Image" choose browse and browse to the UBUNTU ISO-image ("standard" then "ISO" then select "Ubuntu") you just copied. Now go to the console and start up the virtual machine. It will open with the Ubuntu desktop. Select the Install icon.
and install it (the download is an ISO-file). Make a map ISO in "d:\Virtual Machines" and copy the UBUNTU ISO image there. In VM Ware select the virtual server you created and select in the hardware list the CDROM/DVD option. Choose edit. Under the section "ISO Image" choose browse and browse to the UBUNTU ISO-image ("standard" then "ISO" then select "Ubuntu") you just copied. Now go to the console and start up the virtual machine. It will open with the Ubuntu desktop. Select the Install icon.
Now the Ubuntu operating system will install. After it is finished you need to reboot the virtual machine. The CDRom drive will indicate that it is locked. You can select to override.
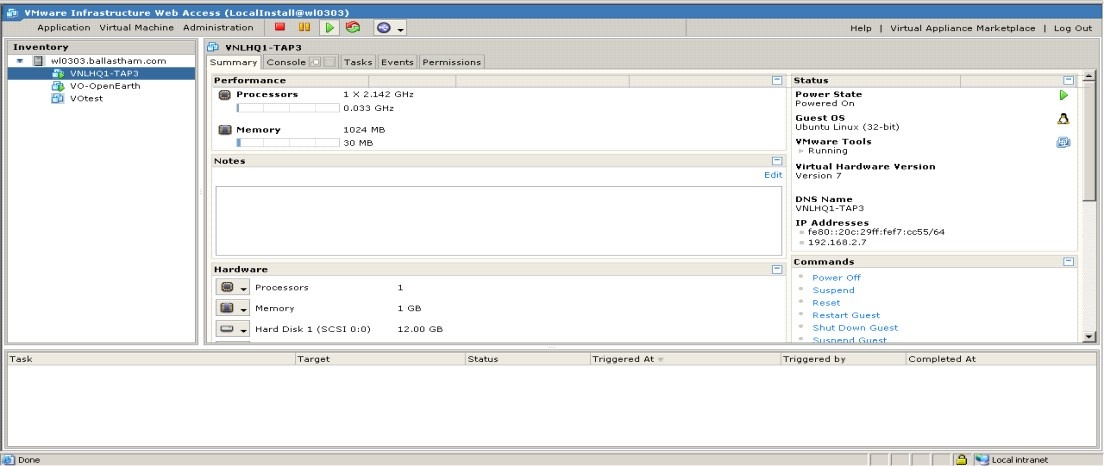
Once the virtual machine is created select it:
- select in the summary tab to install the VMWare Tools
- the VMWare Tools installation CD is now inserted in the virtual CD Rom drive. It will popup automatically. Drag the files (vmware-tools-distrib and VMwareTools-7.7.5-15645.tar.gz) to the desktop. Open a terminal and install the tools:
cd Desktop/vmware-tools-distrib/cd.
sudo ./vmware-install.pl
Select for all options the indicated default value (NB: some steps take some time to complete ... be patient). When prompted for display size option [12] is recommended (1024x768).
Ubuntu will suggest to install security updates. You can install them if you want to.
Install Subversion and create repositories
First install subversion using the synaptic package manager. You may need to reload for subversion to appear in the package list. Select "subversion" and "subversion-tools". Once subversion package is installed the instructions on
https://help.ubuntu.com/community/Subversion![]()
can be followed to set up subversion repositories.
A directory can be created where new repositories can be put:
sudo mkdir /home/svn
cd /home/svn
A new repository is created by issuing the following commands:
sudo mkdir myproject
sudo chown -R www-data:subversion myproject
sudo chmod -R g+rws myproject
sudo svnadmin create /home/svn/myproject
sudo chmod -R g+rws myproject
In each repository directory uncomment the password keyword in the svn config file "svnserve.conf" and add usernames and passwords to the passwordfile "passwd".
To start the svnservice and make it remotely accessible start the following svnserve with the following command:
sudo svnserve -d --foreground -r /home/svn
or
sudo -u www-data svnserve -d --foreground -r /home/svn
It is also possible to make svnserve start automatically on bootup. Follow the instructions on:
http://odyniec.net/articles/ubuntu-subversion-server/![]()
under the section "Svnserve Initialisation Script". It basically comes down to copying the info from:
http://odyniec.net/articles/ubuntu-subversion-server/svnserve![]()
to a file (e.g. using gedit) and saving it as "/etc/init.d/svnserve". Make sure the info in svnserve is edited to include the directory you selected for the location of repositories. The script is installed by running:
sudo update-rc.d svnserve defaults
Install Tomcat and Thredds (OpenDap server for netCDF files)
With the Synaptic package manager install Tomcat6 (select all packages with Tomcat6*). Once the package is installed you van start the Tomcat6 server by issuing the following command:
sudo /etc/init.d/tomcat6 start
or
sudo /etc/init.d/tomcat6 restart
Under "/var/lib/tomcat6/" create a directory "content" and set the proper groups and rights:
cd /var/lib/tomcat6/
sudo mkdir content
sudo chown tomcat6:tomcat6 content

sudo /etc/init.d/tomcat6 restart
You can now install Thredds. Download Thredds and mount the .war file by accessing [ip-number]:8080/manager/html" class="external-link" rel="nofollow">http://[ip-number]:8080/manager/html![]() , where [ip-number] is the ip-number of your virtual server.
, where [ip-number] is the ip-number of your virtual server.
Edit in "/var/lib/tomcat6/content/thredds" the file "tomcat-users.xml". Create a role admin and manager in the config.xml and create a user (e.g. admin) and assign it both roles. For more detail see:
https://help.ubuntu.com/8.10/serverguide/C/tomcat.html![]()
Edit in "/var/lib/tomcat6/content/thredds" the file "catalog.xml". Place data at:
/var/data/
Set datasetRoot, datasetScan to the proper data location and indicate the names you wish to appear on the Thredds server. NB: no spaces are allowed in directory names. Change the wildcard to "*.nc".
Thredds will want to write logfiles. The standard security settings are too strict. An adjusted .policy file should be added in "/etc/tomcat6/policy.d/" with the following content:
grant codeBase "file:${catalina.base}/-" {
permission java.security.AllPermission;
};
Name it either 00openpolicy.policy or 51openpolicy.policy so that it is run either first or last (this is indicated by the two digits in the name). Apparently this works. NB: A number that is not first or last still results in problems.
Install Apache webserver (webserver for kml files)
 In synaptic package manager select:
- Apache2
- Apache2-doc
[Apply]
Create a dir OEwww in var/data/
Goto /etc/apache2/sites-enabled/000-default
Make sure you point to /var/data/OEwww
Restart apache service to apply settings
sudo /etc/init.d/apache2 restart
Now open /etc/apache2/sites-enabled/000-default and add (just after documentroot):
AddType application/vnd.google-earth.kml+xml .kml
AddType application/vnd.google-earth.kmz .kmz
Install OpenSSH to enable use of WinSCP
To remotely manage the virtual server install WinSCP. For WinSCP to work you must install OpenSSH-server with the synaptic package manager. For the data directory to be accessible by WinSCP make sure to edit the rights:
sudo chmod -R og+w /var/data
sudo chmod +s /var/data
Overview of useful commands
Find ip-address (see "inet addr" under eth1):
ifconfig -a
Look at thredds server:
[http://[ip-address]:8080/manager/html]
Location of terminal: select "Applications" then "Accessories" then "Terminal"
Location of Synaptic Package Manager: select "System" then "Administration" then "Synaptic Package Manager"
To edit files (use sudo, otherwise you can probably not save the files):
sudo gedit
To find out if an external disk is mounted:
mount
To see available external disks
ls /dev/sd*
This will show externa scsi disks sdb is disk sdb1 is partition1 on disk sdb.
To mount the external disk
mount /dev/sdb1 /var/data -t auto
Put in /etc/fstab to do always on bootup (see instruction below)
To request a manual type eg.:
man mount
In case of failing services stop and restart all services:
sudo /etc/init.d/tomcat6 restart
sudo /etc/init.d/svnserve start
sudo /etc/init.d/svnserve stop
sudo /etc/init.d/apache2 restart
The main authors of this article are Fedor Baart Please note that others may also have edited the contents of this article: |
||||
|---|---|---|---|---|
|