This document describes a possible way of creating <receptor>.txt files for RISC-kit's Bayesian network based decision support system. The approach can be extended to represent buffers around receptors, see Tutorial: Creating a <receptor>.txt for a latent receptor.
Expected Output Format
The <receptor>.txt files should be tab-separated files with values (no headers) in three columns. Each row represents a specific location in the hot spot site. The first column contains areaIDs, the second column receptorIDs and the third column gridIDs. Moreover, all columns are sorted such that the values in receptorID are ascending and each receptor may only be attributed to one area. Files of a different format cannot be read by the BN Adaptor.
Example: ResBuildings.txt
Prerequisites
- A shape file of the 'sub-areas' of the hotspot. Ideally sub-areas are created such that hazards within are similar. It is not necessary (or very desirable) to divide the hotspot such that each area contains (almost) only one receptor type.
- A shape file of the units of the receptor of interest. Units can be a individual entities, such as houses, or equally sized sections of land or infrastructure etc. Note: units cannot be split across areas, but must be uniquely assigned to a single area.
- A hazard.nc file (can be a dummy simulation, as long as it contains the proper grid information)
All three files need to use the same coordinate system.
Creating a FEWSgrid.txt
Before importing the grid to QGIS, a unique gridID needs to be associated to every single model grid point of the hazard.nc files. Note that this means that all the hazard.nc files must have the same format, i.e. all storms must be run either with or without FEWS. It is important to associate the gridID beforehand, because the ordering of grid points may change while importing to QGIS. To do so the first section (%% Add a unique gridID to your FEWS grid and save as csv file to be processed in QGIS) of the matlab script below can be used, which creates a FEWSGrid.txt. This is independent of the grid being structured or unstructured.
Remark: The name "FEWSgrid" may be confusing when working outside of FEWS. In general the grid of a hazard.nc file created through FEWS is not identical to the grid of a hazard.nc file created outside FEWS. If working outside FEWS, FEWSgrid.txt does not contain the grid created through FEWS, but the grid that is directly obtained from the hazard transformation model (XBeach, TELEMAC, etc). In other words this file has nothing to do with FEWS, despite its name.
code_for_receptor_txt_files_v3.m (for testing purposes gridID_ordering_of_BNAdaptor.nc may be useful)
Step-by-step QGIS tutorial
Open a new project in QGIS
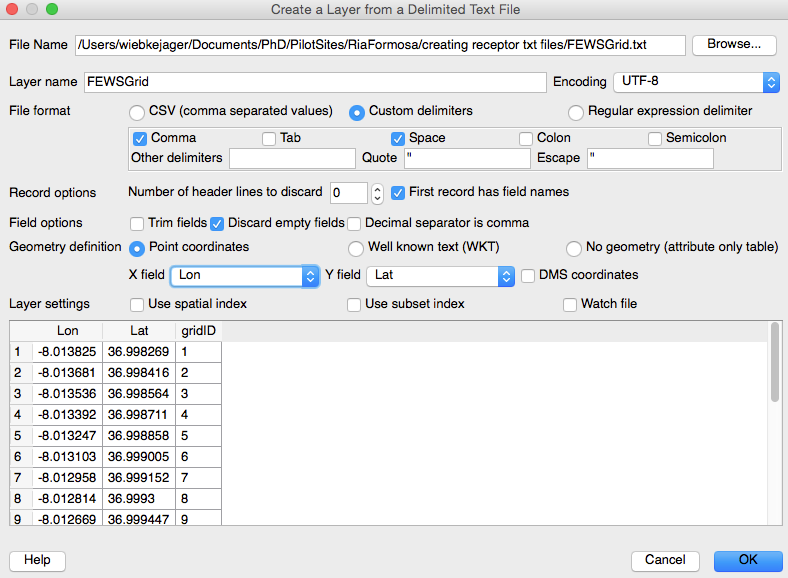
Add the FEWSGrid.txt as an delimited text layer to a empty project (Layer -> Add Layer -> Add Delimited Text Layer). In the popup window select 'First record has field names', e.g.:
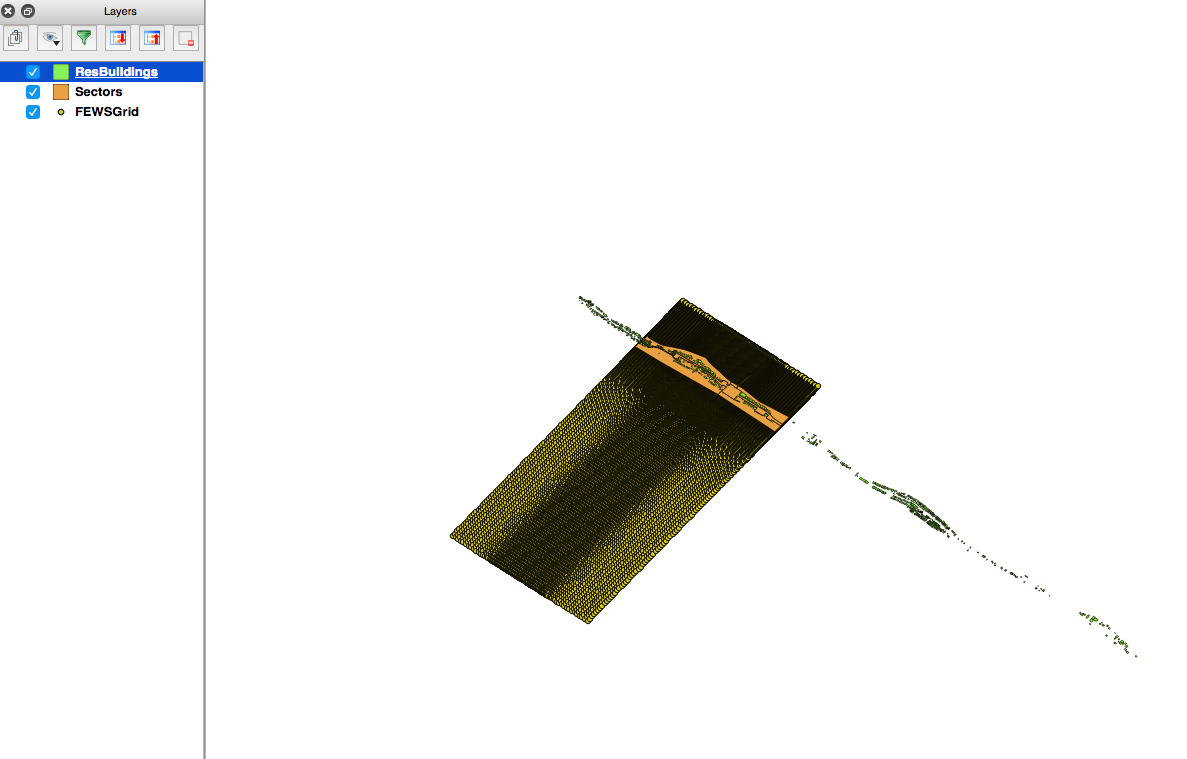
Add the shape files (Layer -> Add Layer -> Add Vector Layer). After this the screen should look like this:
- Introduce unique IDs for each sub-area (or "sector") and each receptor
- Select a layer and open its attribute table (Right click -> Open attribute table)
- 'Toggle editing mode' (pencil icon)
- 'Open field calculator'
- Check the 'Create a new field' box and choose an 'output field name' (receptorID or areaID depending on the layer you selected)
- Set 'Expression' to $rownum
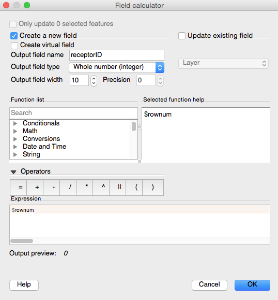
- Click 'Ok'
- 'Save edits' and once more 'Toggle editing mode'
- Repeat a-d for the other layer
- Intersect the receptor layer with the area layer (Vector -> Geoprocessing Tools -> Intersect) and save the new layer under a new name (in this example ResBuildings_hotspot.shp)
The resulting layer will contain all the buildings within the hotspot and associate them with the areaID of the area there in.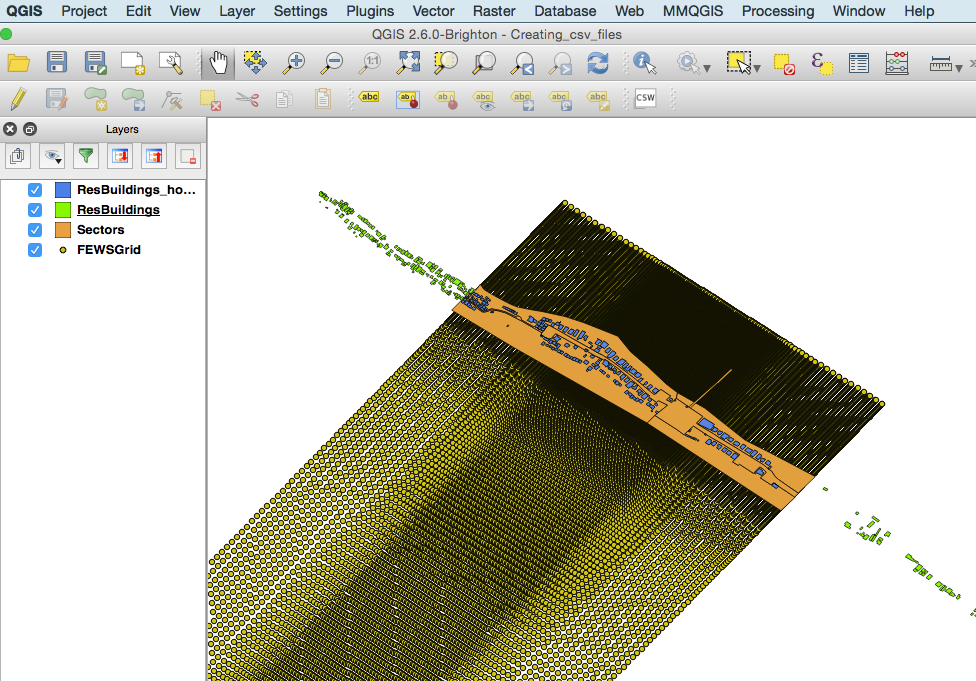
- Create a new polygon shape file from the FEWSGrid layer (Vector -> Geometry tools -> Voronoi Polygons) and save under a new name (in this example FEWSGrid_polygon.shp).
- Intersect this FEWSGrid_polygon layer with the ResBuildings_hotspot layer. (Vector -> Geoprocessing Tools -> Intersect) and save under new name (e.g. ResBuilding_for_BN). Each polygon in the resulting shape layer is associated with a unique combination of gridID, areaID and receptorID. This information is used by the BN Adaptor to understand in which area a receptor is located and which model grid points should be used to calculated its hazard from the hazard.nc. The resulting layer should look similar to this:

- Save the columns areaID, receptorID and gridID (in this order!!) to a <receptor>.txt file and verify that the values in receptorID are in ascending order.
- Right click on ResBuilding_for_BN -> Open Attribute Table
- 'Toggle editing mode'
- 'Delete column': all except areaID, receptorID and gridID
- 'Save edits', again 'Toggle editing mode' and close attribute table
- Save layer as Comma Separated File (Right click on ResBuilding_for_BN -> Save As e.g. 'ResBuildings.csv')
- Open in excel and, if necessary, reorder the columns so that areaID is first, receptorID is second and gridID is third.
- Run the last two sections of above matlab code to test your csv file and to save it as tab-separated <receptor>.txt file, where <receptor> corresponds to the ID of your (latent) receptor as well as the second part of the ID of the hazard variables related to that receptor. E.g. a ResBuildings.txt is linked to a Rnode with ID "ResBuildings" and to all Hnodes that have "_ResBuildings" as part of their ID.