Introduction
The GEF plot program is a simple yet very handy tool to visualise and print the contents of a GEF file. It is a light version of the GEFPlotTool program. Simply browse for a GEF file, choose the quantities you want to plot along the horizontal and vertical axes and there it is.
Installation
The first step for installation is to obtain the program. It can be downloaded by pressing the right mouse key on 'download'. Installation is straight forward.
- Wait untill you have received your (free) key via e-mail
- Navigate to the directory where you have saved the downloaded file.
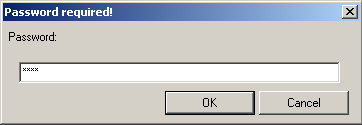
- Unzip the file you have downloaded. Paste the key in the password window. See left figure. You are free to choose a location you like.
- Run the program gefmani.exe once. A filedialog will pop up, where to save the file. See right figure.
- GEFplot.exe is now ready for use.
  |
Optionally you can create a shortcut on your desktop. If you are not familiar with this technique, ask your administrator how to do it, or let him do it.
Usage
Run the program from the command line or double click the shortcut on your desktop. A window will pop up:

Browse to the file of your choise and open it. Next you have to determine the layout of the graph you are going to draw. Click on Layout → Axes

Now you have to choose which quantities you are going to plot. To make this choise easier, two dialogs will popup subsequently, the first allows you to choose which the quantity should be drawn along the horizontal (X) axis, the second dialog allows you to choose the quantity or quantities which should be drawn along the vertical (Y) axis. As soon as you have made your choise, a graph will be drawn in the current window. If you select more than one quantity along the Y axis, a small legend window is automatically generated. The legend window is positioned by default in the right top corner. The user can drag it to any position within the axes.
 |  |
Options
1) Orientation
You can change the orientation from portrait to landscape and visa versa. Click on Layout → Orientation.
A dialog will popup. You may either choose portrait or landscape.

2) Zoom in
Maybe not all of your graph is interesting. Therefore you may like to zoom in on your data. Click on Layout → Zoom → Zoom in.

Your graph will change now into an aixiliary graph. Only the first line of the four lines in this example will be visible. The mouse cursor has changed into a cross (large "+" sign). The process is the same as in the programzoomsave.
- Click with the mouse on the left border of the area of interest. A vertical line will appear on the X coordinate where you have chosen the lower border.
- Click with the mouse on the right border of the area of interest.
- The X range has been determined. A dialog will appear.
- Continue: You are not yet content and like to continue narrowing the X range. Go back to 1.
- Not OK: The X range is too narrow, you would like to undo the last action. Go back to 1.
- Stop: The region is in agreement with your expectations and you would like to see the result for all channels chosen.
- When you have clicked on the Stop button, the zooming process stops. No data is deleted. The auxiliary graph which is used for the determination of the range of interest, disappears and your graph reappears.
 |  |
3) Zoom to default
When you are finished in studying a section of your data in detail, you can restore the default: view all data by clicking on Layout → Zoom → Zoom to default. Your original data will reappear.
4) Grid
By default the graph will be displayed without a grid. Optionally you can switch on (and off) the grid via Layout → Grid. A horizontal and vertical grid will be drawn.
5) Print
If your PC is connected to a printer, a network printer or a virtual printer, you can print your graph. Click on File → Print. A dialog will popup which displays the available printer(s), if any. The orientation of your graph is reflected in the printed version.
6) New file
If you want to visualise another file, click on File → Open. The File Open dialog will popup.