Exercise outline
The goal of this exercise is to build a custom view for volume models. As an example, after this exercise it should be possible to show the input data of volume models partially on a map (the catchments) and partially in a table/chart (the precipitation data), all in one single view.
Preview :

Create a new view
Add a new folder, Views, to the plugin project. In this new folder, create a new user control named VolumeModelView.cs and adapt the contents as shown below (right click the class in the Solution Explorer | View Code).
using System.Collections;
using System.Drawing;
using System.Windows.Forms;
using DelftTools.Controls;
using DeltaShell.Plugins.CommonTools.Gui.Forms.Functions;
using DeltaShell.Plugins.VolumeModel.Layers;
using SharpMap.Data.Providers;
using SharpMap.Layers;
using SharpMap.UI.Forms;

namespace DeltaShell.Plugins.VolumeModel.Views
{
    public partial class VolumeModelView : UserControl, IView
    {
        private Models.VolumeModel volumeModel;
        private readonly MapControl mapControl;
        private readonly FunctionView functionView;
        /// <summary>
        /// Creates a volume model view
        /// </summary>
        public VolumeModelView()
        {
            // Initialize the view (standard user control logic)
            InitializeComponent();
            // Create a map control
            mapControl = new MapControl { Dock = DockStyle.Fill };
            // Create a function view
            functionView = new FunctionView { Dock = DockStyle.Fill };
            // Create a split container which contains the map control and the function view
            var splitContainer = new SplitContainer
            {
                Dock = DockStyle.Fill,
                Orientation = Orientation.Horizontal,
                Panel1 = { Controls = { mapControl } },
                Panel2 = { Controls = { functionView } }
            };
            // Add the split container to the user control
            Controls.Add(splitContainer);
        }
        /// <summary>
        /// The volume data of the view
        /// </summary>
        public object Data
        {
            get { return volumeModel; }
            set
            {
                volumeModel = value as Models.VolumeModel;
                if (volumeModel == null)
                {
                    return; // Do nothing if the data is null or not a volume model
                }
                // Create a layer for the catchments in the basin
                var vectorLayer = new VectorLayer
                {
                    LabelLayer = { Visible = true, LabelColumn = "GM_NAAM" },
                    DataSource = new DrainageBasinFeatureCollection(volumeModel.Basin)
                };
                // Ensure the map control is zoomed to extents after adding or removing features
                vectorLayer.DataSource.FeaturesChanged += (sender, args) => mapControl.Map.ZoomToExtents();
                // Add the new layer to the map control
                mapControl.Map.Layers.Add(vectorLayer);
                // Add the precipitation time series to the function view
                functionView.Data = volumeModel.Precipitation;
            }
        }
        /// <summary>
        /// The image of the volume model view
        /// </summary>
        public Image Image { get; set; }
        /// <summary>
        /// The meta information of the volume model view (which is automatically set by Delta Shell logic)
        /// </summary>
        public ViewInfo ViewInfo { get; set; }
        /// <summary>
        /// Makes the provided <paramref name="item"/> visible (if implemented so)
        /// </summary>
        /// <remarks>Not part of this tutorial</remarks>
        public void EnsureVisible(object item)
        {
        }
    }
}
The custom view class is derived from the IView interface so that it can be registered in the gui plugin (see the next step).
The comments in the code explain the different parts of the view implementation.
A description on the backgrounds and usage of MapControl and FunctionView is not part of this tutorial.
Register the view in the gui plugin class
Register the custom view in the gui plugin by adding the following code to VolumeModelGuiPlugin.cs:
using DelftTools.Controls;
using DeltaShell.Plugins.VolumeModel.Views;
and
        public override IEnumerable<ViewInfo> GetViewInfoObjects()
        {
            yield return new ViewInfo<Models.VolumeModel, VolumeModelView>
                {
                    GetViewName = (volumeModelView, volumeModel) => string.Format("Volume model view ({0})", volumeModel.Name)
                };
        }
Delta Shell should now be able to open a custom view for volume models, containing a map, a table and a chart control.
Exercise results
Set up a volume model as described in the results of the previous exercise (Create a simple Volume model).
This time, during the creation of the model, a dialog containing two types of views will pop up:
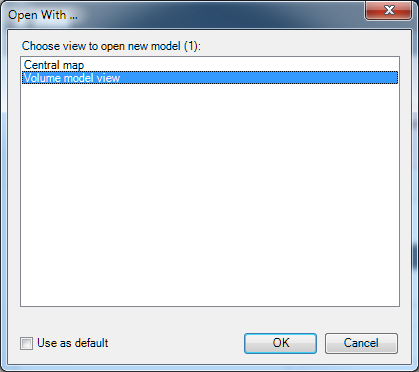
Select Volume model view and the newly implemented view will become visible:
![]()
After importing some catchment and precipitation data, the respective view controls will be automatically updated:
